Cleaning the gaps between car seats is one aspect of car maintenance that is frequently overlooked. Owning a car comes with its fair share of tasks. Over time, dirt, crumbs, and other debris can build up in these small crevices, making them ideal breeding grounds for bacteria and unpleasant odors. In this article, we will dig into How to Clean Cracks Between Car Seats?
How to Clean Cracks Between Car Seats?
Keeping your vehicle situates clean is fundamental for stylish purposes as well as for keeping a solid climate inside your vehicle. Be that as it may, the breaks between vehicle situates frequently represent a test because of their tight and difficult to-arrive at nature. We have compiled a comprehensive guide that covers everything from effective cleaning methods to preparation to help you conquer this cleaning task. Therefore, gather your cleaning supplies, put on some upbeat music, and get started!
Step 1: Gather the Necessary Supplies
Before you start the cleaning system, assembling every one of the important supplies is pivotal. You will save time and have a more enjoyable cleaning experience if you have everything readily available. The following are some things you’ll need:
- Vacuum cleaner with a brush attachment
- Soft bristled brush
- Microfiber cloth Mild detergent or upholstery cleaner
- Warm water
- Toothbrush or cotton swabs for stubborn dirt
- Plastic spatula or credit card for removing sticky residue
Step 2: Prepare the Area
Properly Preparing the Area is Essential to Ensure an Effective Cleaning Process To get started, follow these steps:
Cleaning the Car’s Interior
Before cleaning the cracks, take any loose items out of the car’s interior. This incorporates individual assets, rubbish, and bigger garbage like food coverings or void jugs. Clearing the area will make it easier to get into the cracks and keep your belongings from getting damaged.
Test the Cleaning Item
Prior to applying any cleaning item to the vehicle seats or breaks, testing it on a little, unnoticeable region first is vital. This will assist in ensuring that the product does not damage the upholstery or discolor it. You can move on to the next step once you are certain that the product can be used safely.
Step 3: Vacuum the Cracks
Now is the time to vacuum the cracks to get rid of loose dirt, crumbs, and other debris with a brush attachment. Follow these means for powerful vacuuming:
- Append the brush connection to your vacuum more clean.
- Turn on the vacuum cleaner and set it to medium pull power.
- Start by running the brush connection along the breaks, moving it this way and that to oust any free particles.
- Really focus on the corners and cleft where soil will in general aggregate.
- Keep vacuuming the cracks until they appear clean and free of debris.
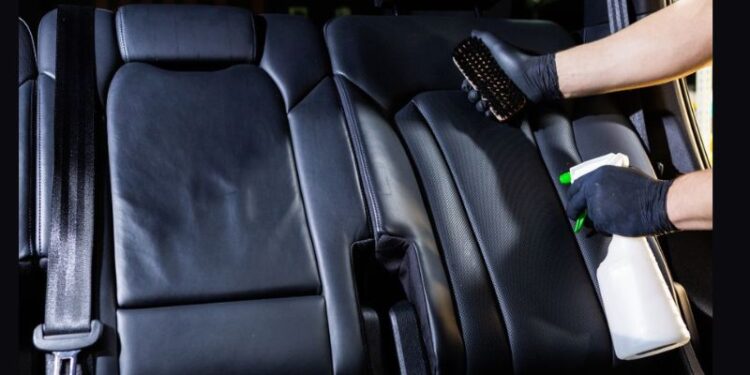
Step 4: Clean with a Soft-Bristled Brush
Even if you vacuum, some dirt and grime may still be stuck there. Follow these steps with a soft-bristled brush to tackle these stubborn particles:
- Dip the soft-bristled brush in a solution of mild detergent or upholstery cleaner and warm water.
- Make sure the brush is damp but not completely wet.
- Delicately scour the breaks between the vehicle seats utilizing roundabout movements.
- The delicate fibers will assist with slackening the soil without making any harm the upholstery.
- Pay attention to the corners and hard-to-reach places where dirt tends to build up the most.
- Keep scrubbing until you can clearly see that the cracks are clean and free of dirt.
Step 5: Address Stubborn Dirt and Stains
Sometimes, stains and dirt that will not go away will need extra care. In such cases, you can utilize a toothbrush or q-tips to target explicit regions. What you can do is:
- Dip a cotton swab or toothbrush in the warm water and detergent mixture.
- Gently scrub the stains and dirt that won’t go away in the cracks with care.
- Reach into small crevices with the cotton swab or the bristles of a toothbrush to free any debris that has become entangled there.
- Keep going until the stains or dirt are barely visible or completely gone.
Step 6: Remove Sticky Residue
The following steps can be used to effectively remove sticky residue, such as beverage spills or sticker adhesive residue:
- Scratch off the tacky buildup delicately utilizing a plastic spatula or a Visa. Take care not to damage or scratch the upholstery.
- Warm water should be used to dampen a microfiber cloth after removing as much residue as possible.
- Delicately smudge the impacted region to relax and eliminate any leftover buildup.
- To assist in lifting the sticky residue, you can use a mild upholstery cleaner on the cloth if necessary.
- Utilize a dry microfiber cloth to absorb any excess moisture after the residue has been completely removed.
Queries About How to Clean Cracks Between Car Seats?
How frequently ought to I clean the cracks in my car seats?
Depending on how often you use your car and how well it is maintained, it is best to clean the cracks between the seats at least once every few months. Cleaning on a regular basis will help keep the interior clean and prevent dirt from building up.
Can I clean the cracks with bleach?
No, utilizing blanch or unforgiving synthetics on vehicle upholstery is not suggested. The fabric may become stained or damaged by these substances. Stick to gentle cleansers or upholstery cleaners explicitly intended for vehicle insides.
What should you do if the cracks have a foul odor?
Assuming that you notice upsetting smells coming from the breaks, sprinkle some baking soft drink on the impacted regions and leave it short-term. The following day, vacuum the cracks to remove the baking soda and any absorbed odors.
Are there any preventive means to keep the breaks clean?
Yes, there are some steps you can take to prevent dirt from building up in the cracks. Consider utilizing seat covers or defensive liners, try not to eat in the vehicle, and consistently eliminate any free flotsam and jetsam or garbage.
Could proficient vehicle specifying administrations clean the breaks?
Yes, cracks between seats are frequently cleaned thoroughly by professional car detailing services. On the off chance that you like to pass on this undertaking to the specialists, look for a trustworthy specifying administration in your space.
Is it conceivable to keep soil from getting into the breaks through and through?
Utilizing seat gap fillers or seat protectors can reduce the amount of dirt that enters the cracks, despite the difficulty of completely preventing it. By closing the space between the seats, these accessories make it less likely for debris to accumulate.
Summary
Although cleaning the spaces between car seats may appear to be a difficult task, it is possible to achieve a fresh and clean interior with the right approach and methods. You will be able to effectively deal with those spaces that are difficult to reach if you follow the step-by-step instructions in this article.
Make sure to gather all of the supplies you’ll need, prepare the area, and begin by vacuuming the cracks to get rid of any loose dirt and debris. For a deeper clean, use a brush with soft bristles and, if necessary, toothbrushes or cotton swabs to remove stubborn dirt and stains. In the event of tacky buildup, utilize a plastic spatula or Visa to scratch it off, and afterward clean the region with a soggy microfiber material.
Additionally, we addressed common concerns, provided helpful advice, and responded to frequently asked questions regarding cleaning cracks between car seats. You can keep your car’s interior clean and pleasant by taking preventative measures and cleaning it frequently.
So, don’t worry if you find those filthy cracks between your car seats the next time. You can confidently tackle the task and enjoy a fresh and clean car interior with the knowledge and methods in this article.